AFree Knitting Pattern From The Archives
I have lost my original notes on this project, so I can’t tell you the exact yarn I used here.
I can tell you it was a fingering weight to sport weight fuzzy yarn.
I can also tell you I used a 5 US (3.75 mm) pair of straight knitting needles.
You will also need a yarn needle for sewing up the ends, ribbon to finish the garter off, and scissors.
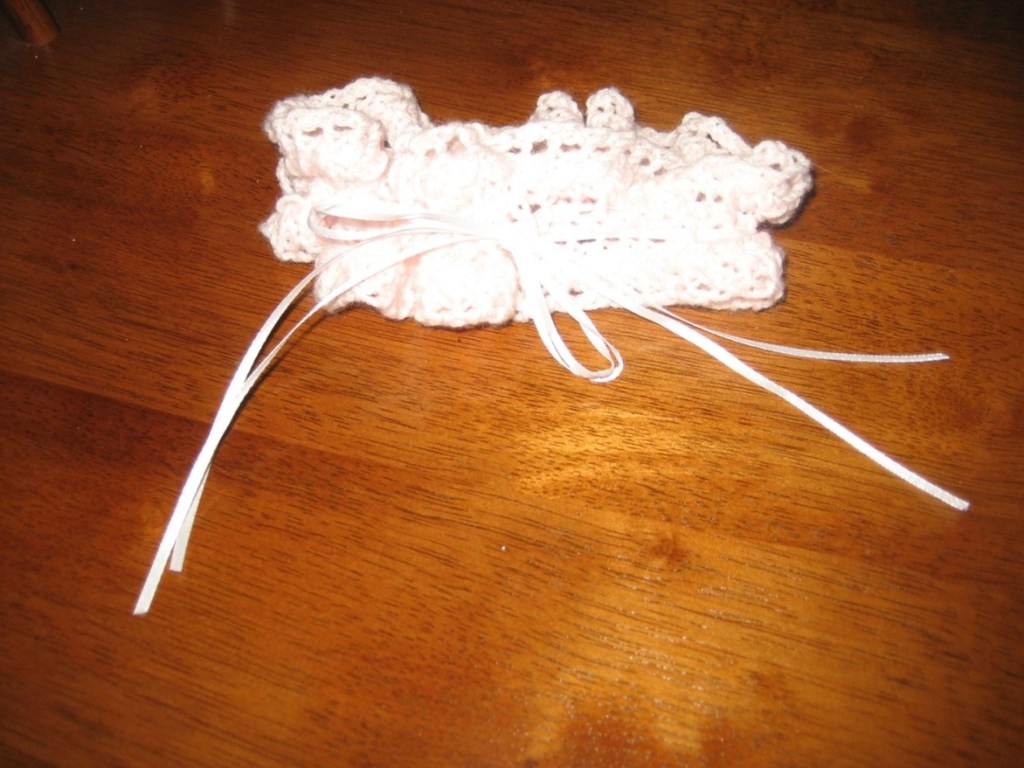
Since this is a wedding garter, feel free to experiment with both yarn and needles. I wanted something delicate and lacey, but still sturdy. The original project called for the sewing on of certain ornaments, in this case, some knitted sushi.
Swatching here is a good thing to do so that you can find the yarn and needle combination that gives you exactly the look you desire.
The stitch pattern I have taken from the book: Mindful Knitting by Tara Jon Manning. I have modified it very slightly for my own edification and ease of memorization.
The stitch is called ‘razor shell lace rib’ and is found on page 83 of this book.
This is my favorite lace pattern. I use it a lot. It is simple, good for beginners, and easy to memorize.
You will need to know how to:
knit (K)
purl (P)
yarn over (YO)
slip stitches (SL)
knit two together (K2tog)
pass slipped stitches over other stitches (PSSO)
You will also need to have basic sewing skills.
This lace pattern has a 6-stitch repeat, with 1 stitch added for the edging.
If you do more than one lace repeat, add six for each repeat you plan to do, maintaining that single-edge stitch throughout.
So you would work the pattern in multiples of 6, plus 1.
Now, it helps if you know the person for whom you are making this garter. You measure their thigh and double that number to find out the length you are to knit the garter.
The sample that I made was for a lady who was a size 0, and I had to guess how big her thigh was. We guess her thigh was 12 inches around. I decided to knit the garter to about 24 inches in length.
You want the garter to be extra long so that it will bunch up and create ruffles around the thigh. If you knit it too long, never fear. You do not have to frog it out (to frog means to unknit your work). Everything will even itself out once the ribbon ties are added. If your garter is too long, it will simply be extra ruffled. This is not a bad thing at all.
You can make your garter as thin or as wide as you’d like.
For this sample, I chose to do a 2 pattern repeat. 6 x 2 + 1 = 13
Pattern abbreviations:
CO = cast on
BO = bind off
R = row ie, R1 = Row 1
K = knit ie, K1 = Knit 1
P = purl ie, P1 = Purl 1
YO = yarn over
SL = slip stitch, in this case, slip stitch knitwise ie, SL1 = slip one stitch
PSSO = pass slipped stitch over
K2tog = knit 2 stitches together
PM: Place marker
SM: Slip marker
Knitwise means as if you were about to knit the stitch, rather than purling the stitch.
This is a two-row pattern repeat:
R1: k1, *yo, k1, {sl1, k2tog, psso}, k1, yo, k1
R2: Purl
*indicates repeat from this stitch onward
For the sample I knit, I :
Loosely cast on 13 stitches.
R1: knit across
R2 (begin stitch pattern): k1, *yo, k1, {sl1, k2tog, psso}, k1, yo, k1
R3: Purl
To aid in counting and keeping up with the pattern, you may want to place a marker in between each 6-stitch pattern repeat. I usually place a marker after the edge stitch as well, so I remember that is what it is.
For my 13-stitch piece, my row would look like this:
K1, place marker (PM), yo, k1, {sl1, k2tog, psso}, k1, yo, k1, PM, yo, k1, {sl1, k2tog, psso}, k1, yo, k1
You simply slip your marker (SM) each time you come to it.
Repeat rows 2 and 3 until the piece measures as long as you want it, in my case roughly 24 inches (or your preferred length).
Bind off loosely after completing a row 3, leaving a long enough tail to use for sewing up the ends.

Cut pieces of ribbon about six inches longer than the measurement of the thigh.
Decide where you would like to thread the ribbon through.
Using the yarn needle to make it easier on you, thread the ribbon in and out of the holes through the rows of holes you have chosen from top to bottom, leaving a little room to sew the edges of the garter together once you are done.
I chose to use the center rows of holes.
I threaded two separate pieces of ribbon, both about 20 inches long, through the holes, a little bit apart, to make it look pretty.
Once you have the ribbons threaded through, leave them alone, and keep them out of the way so you can sew the ends together.

With the right sides together, sew your cast on edge and bind off edge together neatly. I used a simple whipstitch for this.
Weave in your ends.
Turn your garter to the right side, with the ends of the ribbon on the right side of your work.
Pull your ribbons together to cause the garter to ruffle up.
When the bride wears the garter, untie the ribbons and loosen the ruffles, slip the garter up to the right spot on her thigh, and then gently but firmly tie the ribbons to form a bow to secure the garter to her leg.
You are all done.


You must be logged in to post a comment.