Another Freebie From The Archive
This is a simple blanket pattern. It can be made in any size with no real changes to the pattern. Basically, all you need to do is adjust your foundation chain to the size you want your finished blanket to suit the yarn you are using, as well as using a hook size that works for the yarn you have chosen.

Abbreviations
I use the American crochet terms in this pattern.
Ch = chain
Sc = single crochet
Hdc = half double crochet
Dc = double crochet
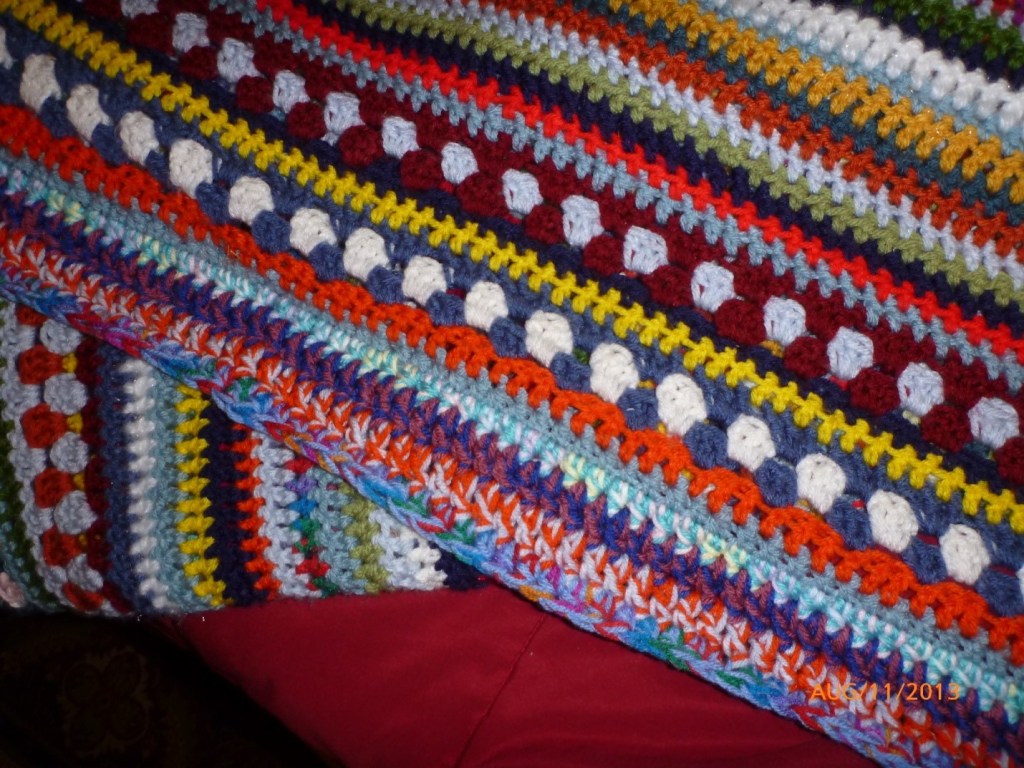
For my blanket, and this is the sample made in the pictures here, I used worsted-weight acrylic yarns with an I hook.
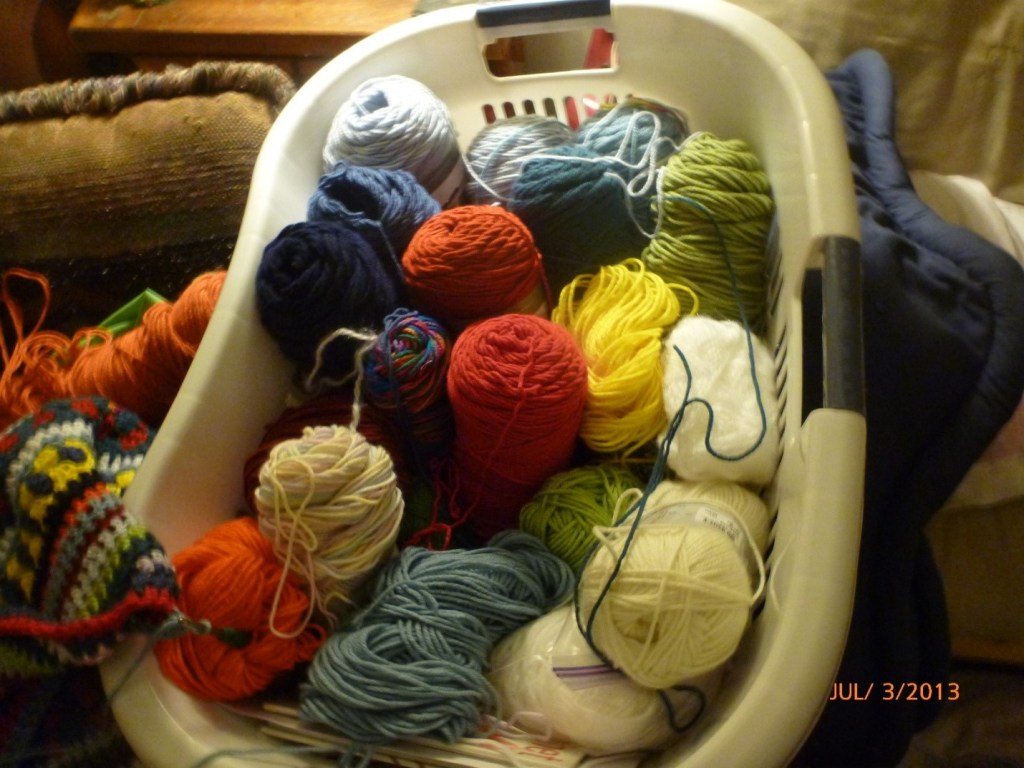
I used roughly thirteen skeins of yarn, running from 250 to 445 yards each. I used a lot of partial skeins and unbanded skeins. I stuck with worsted weights, all pretty similar to one another, throughout the project.
Choose colors and yarns that work for you. I had originally intended to crochet this blanket out of cotton yarn, but I thought it might be too heavy…and with small children running around, I thought the acrylic yarn would be easier to maintain…as it will wear through multiple washings.
I also did this weird pattern thing where I used a shade of blue every other row. I didn’t really pay much attention to the other rows as it was meant to be a colorful blanket. The only thing I watched was that I did not repeat the same color too close to itself. This is completely optional; you do not have to do anything like this.
You can change color with every row. You can change color every few rows. You can crochet the entire blanket in the same color. This is all up to you.
You can also use a thinner weight yarn with a smaller hook—or a heavier weight yarn with a larger hook. This is completely up to you. You can make a baby blanket. You can make a throw. You can make any size you want. This pattern is very forgiving.
I created a foundation chain of 198 sc. This made a king-sized blanket. Create your foundation chain as wide as you want your blanket to be, making sure to #1 ch an even number of sc and #2 remember how many you chained.
I will leave it up to you if you want to change colors every row or however you want to do it. I will simply write the pattern out without color changes so that no one gets confused.
You’ve made your foundation chain to the length you want your blanket wide, using an even number that you remember.
Row 1: Hdc into the first stitch and across to the end. Turn. Ch 3.
Row 2: Dc into first stitch and dc across to end. Turn. Ch 3.
Begin 3 rows of granny stripes.
Row 3: 2dc into the first stitch. (Ch counts as 1 dc here.) Skip the next 2 stitches. 3dc into the next stitch. Repeat to the end of the row. Turn. Ch 3.
Row 4: 2dc into first space between previous rows last 2-3dc sets, skip to the next open space. 3dc into the next space between 3dc sets from the previous row. You are working into the open spaces between the sets of 3dc across the row. At your last space between 3dcs from the previous row, 2 dc into the space, skip 2 stitches, and work 1 dc into the last stitch of the row. Turn. Ch 3.
Row 5: repeat Row 4
Row 6: Hdc into each stitch across the row. Turn. Ch 3.
Row 7: Dc into each stitch across the row. Turn. Ch 3.
Rows 8-10: Repeat rows 3-5 for 3 more rows of granny striping.
On rows where your count does not come out evenly, 2 dc into the second to the last stitch, dc into the last stitch. Turn. Ch 3.
It doesn’t hurt after that third granny stripe to count your stitches and make sure you still have the right count.
Repeat rows 1-2 for fourteen rows.
Then repeat rows 3-10.
Continue these repeats:
Repeat rows 1-2 for fourteen rows.
Then repeat rows 3-10 until your blanket is as long as you want it to be.
Fasten off. Weave in any ends.

ORIGINAL EDGING INSTRUCTIONS:
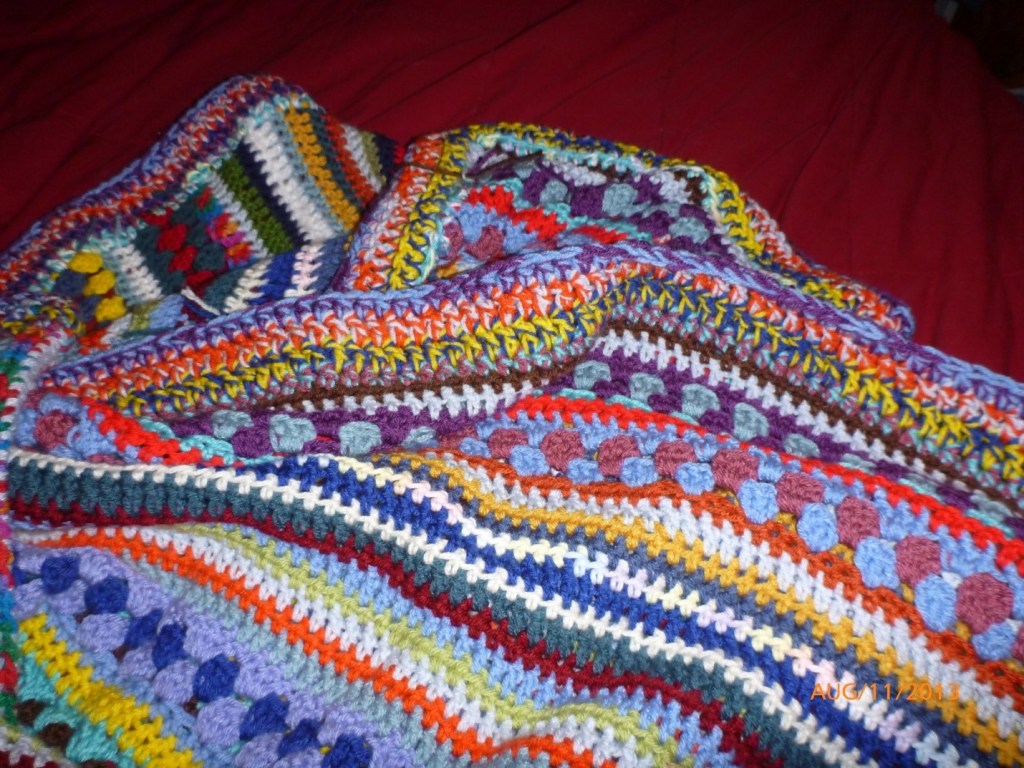
Now, you can decide if you want an edging or not. Since I had such an eclectic color scheme on mine, I wanted to make sure that I had #1 a simple border and #2 that you could tell the difference between the edging and the body of the blanket.
I took a K hook and held three different colored yarns as one—still the worsted weight yarns I had used throughout the blanket—and I did a round of hdc around the entire blanket…when I came to the corners, I would hdc into that corner stitch.
Then, I did another round, this time of dc, again doing the three stitches, this time dc, in the corners.
I repeated a round of hdc, followed by a round of dc.
Then I fastened off, made sure I wove in all my ends, threw it in the washer, then the dryer…and tossed it on the bed –and stood there absolutely AGOG because I had no idea just how BIG the thing was until it was on the bed.
So, follow the instructions for your yarn on washing/drying/etc.
NEW EDGING INSTRUCTIONS NOW THAT I KNOW BETTER:
I may or may not go with using three strands of yarn as one. If I did, I would continue with the K hook.
Otherwise, I would use a single strand of yarn and the same hook I made the blanket with.
I would follow the same pattern of stitches as above, except when I got to the corners. Corners would be:
First-row corners: work 2 hdc into corner space, chain 3 to 4, work an additional 2 hdc into the same corner space.
Second-row corners: work 2 dc into corner space, chain 3 to 4 (stay consistent with your number of chains), work an additional 2 dc into the same corner space.
Repeat first-row corners for the third round.
If you have any questions, or if something wasn’t clear, please let me know in the comments.


You must be logged in to post a comment.